Showing posts with label Canning and Preserving. Show all posts

2.11.2011

Guest Post: 5 Ways to Begin a More Self-Sufficient Lifestyle, Part Two


[image: Kendra's home-baked bread]

~ Precious mamas, my family is off on an adventure this week, and the very talented Kendra from New Life On a Homestead has graciously agreed to share her thoughts with you here today.  This is Part Two of "5 Ways to Begin a More Self-Sufficient Lifestyle."  I'll be back with you all next week to share some exciting news! ~

***If you missed Part One, you can find it here.

4.  COOKING FROM SCRATCH

Nowadays, it seems almost counter-cultural to cook food from scratch at home. I’m talking, from scratch people… and no, hamburger helper doesn’t count! Think of all of the money you’ll save, all of the health benefits you will reap, and the comfort you’ll have knowing that you can prepare a nutritious meal for your family.

Stop depending on fast food chains and the deli to feed your family. Cook it yourself! Learn to make pizzas from scratch (dough and sauce included), home-baked bread, and even condiments like mayonnaise, ketchup, BBQ sauce, salad dressings, vanilla extract, spice blends… anything you’d normally buy already made for you. You can learn to do these things yourself! And I think you’ll be amazed at how easy it is once you’ve given it a shot.

5.  NATURAL HEALTH CARE

Another thing we are entirely too dependent upon is the pharmaceutical industry. If our kids have a cold, we are quick to pump them full of the first syrup we can reach off the shelf.  If we have a headache, we just cover our pain with a few pills. And if we aren’t feeling well, most of us won’t think twice about swallowing a week’s worth of antibiotics. Do you realize that there are natural, healthier alternatives for our most basic health care needs?

I’d strongly encourage you to learn basic natural remedies to treat your family with. Ear infections can be quickly remedied with an easy garlic and olive oil treatment. Urinary tract infections can be relieved with lots of water, vitamin C, and garlic tablets. Pink eye can be cured with breastmilk, or eyebright and chamomile tea bags.

The next time you find yourself reaching into the medicine cabinet, stop for a moment and turn your focus toward finding a natural treatment to try first. Taking your health care into your own hands will save you time, money, and most importantly, the well-being of you and your loved ones.

Of course, these are just a handful of ideas to start with when beginning your own journey to self-sufficient living.  There are so many things you can do to break free from dependence on others, but these are important starting points, and anybody anywhere can do them!  Be encouraged, pick one or two of these skills, and get them under your belt. Then work your way to a more self-sufficient lifestyle!


Kendra is a full time, homeschooling stay-at-home mom to three little ones, with a fourth on the way! Her and her husband moved to the country two years ago, and have been working hard at learning how to live a more self-sufficient lifestyle.
 
You can follow the ups and downs of their journey at New Life On A Homestead.


If you enjoyed this post, subscribe to Like a Bubbling Brook - it's free!
Or, follow along on Facebook.


2.09.2011

Guest Post: 5 Ways to Begin a More Self-Sufficient Lifestyle, Part One

[photo: Kendra's pear preserves...yum!]

~ Precious mamas, my family is off on an adventure this week, and the very talented Kendra from New Life On a Homestead has graciously agreed to share her thoughts with you here today.  This is Part One of "5 Ways to Begin a More Self-Sufficient Lifestyle."  Be sure to check back on Friday for Part Two.  I'll return next week and will share some exciting news! ~


The idea of learning to do more for your family and depend less on others to survive can seem like a daunting task. Where do you begin? Some people imagine the self-sufficient life to mean hauling water from a nearby creek in a bucket and using the bathroom outdoors. Doing more on your own doesn’t have to begin so dramatically (although, I think being prepared for off-grid living is a worthy goal!). Starting slowly is the best way to prevent yourself from being overwhelmed and burning out quickly.

Here are five easy ways anyone can begin living a more self-sufficient lifestyle, and learn to survive without having to depend on others for the most basic necessities:

1.  FOOD

The most important thing you can ever learn is to do is to grow your own food. You don’t have to have a huge yard to have a garden, either. Container gardening can be just as productive, and even more productive, than a traditional garden plot in the yard.

If you are new to gardening, and a little intimidated by the idea, start off by purchasing a few of your favorite vegetable plants from a local nursery. Don’t go crazy and buy a bunch of stuff though; you don’t want to overwhelm yourself! Ask the nursery worker for advice on planting your seedlings at home, borrow a few gardening books from your library or look up info online, and get those beautiful veggies in some soil!

2.  WATER

Another most basic necessity you’ll need to learn is how to harvest water. Even if you are on city water and don’t think you’ll ever need to worry about finding it for yourself, it’s an extremely important skill to have under your belt. You don’t have to use it every day, but knowing that if you had to, you could provide clean water for your family, will definitely be a comfort to you and your loved ones.

If you are on a private well, consider installing a hand pump on it, if you can afford to do so. Or, you can learn to make a small emergency well bucket, like this one, to have on hand, so that you can access your well water when power isn’t available.

Installing rain barrels is another important step toward self-sufficient living. Not only can you water your plants and animals with this precious resource, you could also wash your clothing, dishes, and filter it for drinking water, if you had to. If you’re planning on collecting water from either the rain or from a stream, you’ll need to filter it before it’s safe to drink. You can make a homemade Berkey style water filter for a fraction of the price of the real thing.

3.  CLOTHING

Learning to sew your own clothing is a huge step toward becoming more self-sufficient. Think of all of the money our culture spends on fashion! If you could learn to make simple clothing items for you and your children, what a blessing that knowledge would be to have. If you are new to sewing, start off small by learning to hem, mend, and attach buttons.


...to be continued in Part Two this Friday!  Be sure to subscribe for free email updates of new posts so you don't miss it!


Kendra is a full time, homeschooling stay-at-home mom to three little ones, with a fourth on the way! Her and her husband moved to the country two years ago and have been working hard at learning how to live a more self-sufficient lifestyle.

You can follow the ups and downs of their journey at New Life On A Homestead.


 {also shared at Simple Lives ThursdayRaising Homemakers and WFMW}
 
 
If you enjoyed this post, subscribe to Like a Bubbling Brook - it's free!
You can also easily follow along on Facebook.

~ Have you entered our 1st birthday giveaway yet? ~


1.10.2011

Guest Post: Five Simple Ways To Build Your Pantry In 2011

Today I am excited to share this guest post with you from Brandy at The Prudent Homemaker.  I've frequented her site for quite awhile and have gleaned so much from it.  I'm certain you'll find her helpful and inspiring, too.  What a blessing she is!  It's an honor to share her with you here today.


Having a good pantry can bless your family in many ways.  It can be as simple as not having to run to the store at the last minute because you’ve forgotten to buy an ingredient (because you always have everything on hand), to being able to cook a week’s worth of meals when you’re snowed in (and not having to brave the elements and face possibly empty store shelves for bread and milk, to being able to feed your family without shopping for a year because your family has lost their source of income.

In addition, having a well-stocked pantry will save you money (and not just the cost of gas for multiple last-minute store trips) because you can buy things ONLY when they are their lowest price.

Ready to save some money and be more prepared in 2011? Here are five simple ways to build your pantry this year:

1. Shop Sales

It sounds simple, and it is. Only buy food and toiletries on sale. Aim for the lowest priced sales, and only buy when prices are at their lowest. For example, chuck roast may be $4.99 a pound where you live. However, if you wait, it will go on sale. It may go on sale for $2.99 a pound, and you may think that’s okay. My personal rule is no meat over $2 a pound. If you’re willing to eat something else cheaper until the next sale, you can wait to buy chuck roast until it’s $1.99 or even $1.89 a pound.

Many foods go on sale for 50% off, and sometimes even up to 70% off. (And when you’re ready to save even more, coupons on top of sales can take you all the way up to 100% off on lots of items!)

This may sound great to you, but how are you going to eat in the meantime? Besides eating what’s cheapest this week, you can be prepared to only pay $2 or less per pound for meat every single time, by following step #2.

2. Buy More

When you see a great deal on something, stock up. Most sales run in 12 week cycles, so calculate how many you might need to get through to the next sale (or longer). For example, if pasta is on sale for .50 a pound, and you know you eat spaghetti once a month, buy at least three packages of spaghetti noodles. You’ll have only spent another $1.00 more than the one you would have bought for this month, and yet you’ll have saved money for the next couple of months. It may seem like a tiny thing, but as you practice this, you’ll end up spending significantly less in the long run, and you can cut your grocery budget by 60% or more--this year.


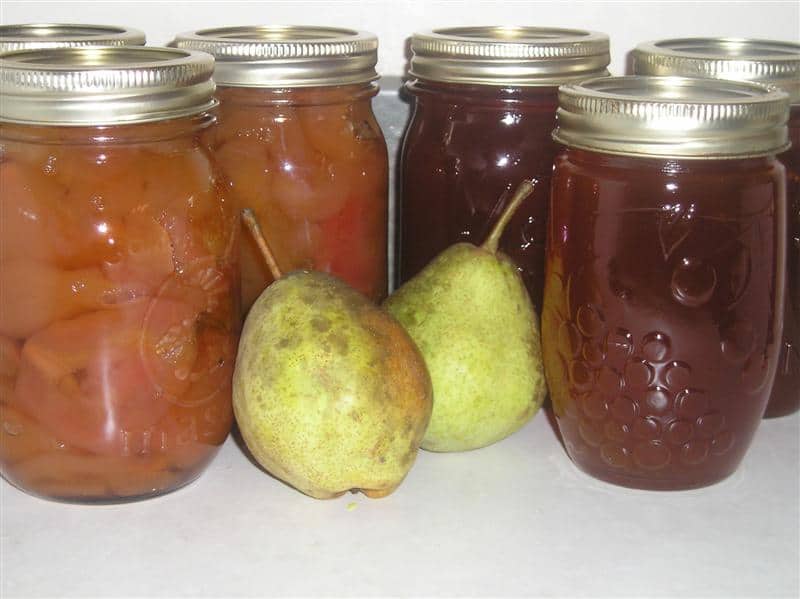
3.  Take Advantage of Produce in Season

We all know that peaches taste best in season. Like all fruits and vegetables, they’re cheapest at the same time that they’re the most delicious. Whether you get them from your own garden, a CSA, your local farmer’s market, a friend’s garden, or even from the grocery store, you’re going to pay the least when they’re the best, and wish that they could taste like that and cost like that all year long.

Instead of wishing, do something about it! Buy lots of fruit in season! Take it home, and freeze or can peaches, peach jam, peach nectar, and peach puree for baby food. And of course, don’t forget about apricots, pears, plums, apples, strawberries, and even grapefruit! Not only will this save you money on groceries, but you’ll have some inexpensive Christmas gifts for family and friends as well. There is nothing quite like apricot jam made with the ripest apricots available. Your friends and family will thank you—and ask for the same present next year.

If you’re wondering how you’re going to build up a pantry when you seem to already be eating everything in your house until next pay day, you can use this simple way (#4) to keep your pantry full:


4.  Buy Less Expensive Food

Have you ever added up the cost of your favorite meals? I have. I can feed my family of 8 for anywhere between $1.50 to $8 for all of us (and have leftovers, too!) I can stretch my money a lot further if I eat the less expensive meals more often each month. Many of those less-expensive meals are favorites at my house, so someone is always thrilled! If you eat more soups, rice, beans or potatoes, for example, your family will still be full, and you’ll have more money to use to buy more food for your pantry shelves. In 2010, I fed my family for less than $.70 per person per day. We ate the more expensive meals on occasion, but as we focused on the less expensive meals, we were able to eat plenty of delicious food—even though our income has been cut by 70%.


5.  Buy Staples in Bulk

There are many ways to buy in bulk. If you have a warehouse store like Sam’s Club, Costco, or B.J.’s, bulk purchases are simple. But even if you don’t, there are plenty of other places that you can buy from (and may want to buy from as well). If all you have is Walmart and your local grocery store, look for the big (25 pounds) of rice, beans, and flour on the bottom shelves. Beans for $1.25 a pound may not sound too expensive, but beans for 58.4 cents a pound are even better. Bulk purchases are a simple and quick way to inexpensively build up your pantry.

And if you’re not sure what your husband will think, be sure to stock his favorites more often with the money you’re saving, and have them ready to pull out for late-night dates after the children are in bed. In my pantry, we keep the chocolate chips (in the 5lb. bag) on the top shelf :)


Brandy Simper is the mother of 6 children.  She writes about frugal meals, homeschooling, gardening, sewing, and ways to save money at The Prudent Homemaker.  Be sure to visit her there!


Photos copyright The Prudent Homemaker


If you enjoyed this post, subscribe to Like a Bubbling Brook - it's free!
Follow along on Facebook.
 
Try Crown Financial Ministries' online envelope budgeting program, Mvelopes, FREE for two weeks by using this link. Cancel anytime! [ad]


8.22.2010

Meal Plan Ideas (& This Week's Canning)


Last week I did quite a bit of canning; it began with peaches and ended with tomato sauce.  Since we use tomato sauce frequently, I made two kinds of sauce.

First, I made a batch of Tomato Basil Sauce from a recipe I found in Ashley English's book Canning & Preserving.  The sauce tastes wonderful (yes, I used one can already.... I was desperate to try it!), and I highly recommend this book if you are new to canning.  It was one of the best, most detailed books on canning that I have come across.

The Tomato Basil Sauce was a bit light, with more of a crushed tomato base.  The next time I use that recipe I will let it simmer a bit longer so it thickens a tad more.  It had a wonderful flavor, though, and was seasoned with onions, basil, and garlic.  When I used the one jar for dinner, I first gently sauteed some onion, red and yellow bell peppers, and zucchini, then I added in the sauce.  I served it over pasta, with some parmesan sprinkled on top:


Then, I made a batch of plain tomato sauce, based on the recipe at Heavenly Homemakers. I couldn't bear to leave the skins on (although Laura did) so I removed the skins first. I also added one tablespoon of lemon juice to each pint, just in case this batch of tomatoes didn't have enough acidity for the boiling water canning method (I'm trying to be ultra-careful about that!). Laura's idea for putting the quartered tomatoes into a blender made things progress more efficiently. I think I'll do that from now on :)


Finally, a sweet older woman from our church came over and helped me freeze corn on the cob this week.  We prepared and processed 60 ears of corn in a little over an hour.  It's amazing how quickly things get done when you have help!  As a thank you from us, she left our home with a box full of food: a dozen ears of corn, several large tomatoes, some cinnamon raisin walnut bread... :)


So, what's on my menu for this week?  As usual, our meals are healthy *and* frugal, usually costing us less than $5 total for dinner, sometimes less. We're trying to eat mostly from the pantry this week, with the exception of running to the store for some produce and milk.  I'm also trying not to pop open my freshly canned yummies yet, so here's what I came up with...

Breakfasts:
Horseradish eggs with dill
Maple pecan muffins
Cinnamon raisin walnut bread with homemade blueberry jam
Cereal and fresh fruit
"Salty" eggs

Lunches:
Tuna and cheddar on crusty whole wheat bread
Egg salad on authentic German pretzel bread
Caesar salad with chicken
Leftovers from the previous day

Dinners:
Chili pie, side salad, authentic German pretzel bread
Grilled chicken, grilled carrots, rice
Spaghetti with tomatoes, bacon, and onion, and crusty whole wheat bread
Chicken tacos with mexican rice
Beef (and kosher) hot dogs with corn on the cob

What are you serving for dinner this week? I'd love to know!

           Joyfully,
post signature

{Linked up with Meal Plan Monday}


~~~~~~~~~~~~~~~
Thanks for taking the time to visit Like a Bubbling Brook.  If you're new here, you may want to subscribe to receive free updates via email.
 
 Search & Win


8.17.2010

Stocking Our Pantry

Today was an exciting day for stocking our little pantry.

This morning, I came across a fantastic sale on bi-color sweet corn, which I am going to freeze and use through the winter.  Five dozen ears were bagged and selling for only $10.  That same market also had large, meaty tomatoes marked at .50 lb, or 1/2 bushel for $10.  I bought the 1/2 bushel, and will be canning tomato-basil sauce this week :)

This evening, I met with a sweet lady who used to sell her homemade granola in local stores; now she is closing her business and sold me some items for much less than I'd pay in the store, and they are better quality, too... Here's what I purchased from her:

Raisins @ .74 cents a pound (I bought 30 pounds!!!)
Brown sugar @ .50 cents a pound
Chopped walnuts @ .14 cents an ounce
The most wonderful milk chocolate chips EVER @ $1.50 a pound

As much as we love our Cinnamon Raisin Walnut Bread, it will still take quite a while to use all thirty pounds of raisins, so I put them into several gallon freezer bags and will store them in our extra freezer.

All that, and I still haven't mentioned the peaches we canned on Monday.  Last week, a local supermarket had a loss leader sale on free stone peaches... only .58 cents a pound.

A sweet lady from church came over and helped me can ten pounds of these peaches.  I don't have much experience canning, and had never canned peaches before.  She has been canning for over forty years so I was fairly confident that, with her help, the canned peaches would be perfect.  We had a wonderful time, great conversation, and I was so proud of the finished peaches!  Beautiful!

Here are a few photos from my peach canning "debut" ~


Are you preparing your pantry for winter?  What do you do?  I'd love to know!

           Warmly,
post signature


{Linked with Pennywise PlatterReal Food WednesdayWFMW and Gratituesday}
~~~~~~~~~~~~~~~
Thanks for taking the time to visit Like a Bubbling Brook. As another busy mama, I understand that your very few spare minutes are precious. If you're new here, you may want to subscribe to receive free updates via email. Thanks for visiting!
 
 Search & Win


7.26.2010

How To Make Scrumptious Blueberry Jam


We've been drowning in blueberries the last several days... we went blueberry picking and have since made blueberry pie, blueberry muffins, and lots of blueberry jam.  I thought I'd take a few minutes to share with you how we make our blueberry freezer jam.  It's really quite simple to do! 

My recipe is a reduced-sugar recipe, so you can enjoy more of the fresh fruit taste.  It also doesn't require Sure-jell or any kind of pectin; you really don't need to use it with blueberries.

One thing to keep in mind is that you want to work in small batches, or your jam may not set properly.  I've had good results doing six cups per batch, so...

Rinse six cups of blueberries and pour them into a large, heavy pot; set pot to medium high.


As blueberries come to a simmer, mash them with a potato masher until they are a bit soupy in consistency.  Let them simmer for 2-3 minutes, then slowly add in three cups of white sugar, stirring constantly.

Bring to an even boil, where the pot is still bubbling although you are stirring, and let boil gently for about 5-7 minutes.


When you think the jam has thickened a bit, put a tablespoon or two of the jam on a small plate and place it in the freezer for one minute.  When you pull the plate out and tilt it diagonally, does the jam try to hold it's shape a bit, or is it runny?  If it tries to hold a shape, you are ready to remove the pot from the burner.


Ladle the jam into clean jelly jars (you'll need six of them, although I used larger jars here since I was out of jelly jars), put on the lids and rings, and let sit on a cooling rack until they've reached room temperature, which may take a few hours.


Once the jam is ready, I put one in the fridge to use right away, and the others in my deep freeze for later :) 

(We've prepared peach jam the same way, using peeled and chopped peaches... both are scrumptious spooned onto a slice of homemade bread or warmed over vanilla ice cream!)

Blueberry jam over my cinnamon raisin walnut bread

What's your favorite kind of jam?

           Enjoy,
post signature


~~~~~~~~~~~~~~~
{Linked with Finer Things FridayJust Something I Whipped Up, Tuesdays at the Table, Tempt My Tummy Tuesday, Slightly Indulgent Tuesday, and 30 Minute Blog Challenge}

Thanks for taking the time to visit Like a Bubbling Brook. As another busy mama, I understand that your very few spare minutes are precious. If you're new here, you may want to subscribe to receive free updates via email. Thanks for visiting!
 
 Search & Win


Related Posts with Thumbnails