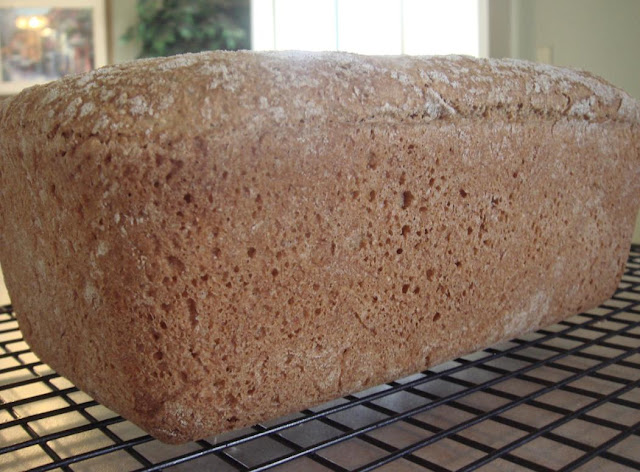
Did you know that soaking your grains and flours prior to using them helps make them more digestible and soft? This is especially wonderful for my family, as we've found that our freshly ground grain can sometimes taste a little chewy if it has not been soaked before being made into dough. There's quite an improved taste when your wheat flour has been soaked first!
This is a fairly new method of baking for me, and I've adapted this recipe from one in the Whole Grain Breads book by Peter Reinhart. I've tweaked the recipe a bit to make it more friendly for my own kitchen.
Also, I only had soft white wheat (rather than hard white or red) on hand when I made this bread, so that it what I used. The texture of my loaf is a little softer/crumblier, and that is because there is less protein in soft wheat than there is in hard :o)
If you are grinding your own wheat, you will want at least 4 cups of flour ready; 3 1/2 for soaking, and another 1/2 cup or so for adding to the final dough the next day.
Here's what to do:
First, mix 1 3/4 cups of whole wheat flour, 1/2 tsp salt, 3/4 cup milk, and 2 tbsp whey if you have it (otherwise milk or yogurt is sufficient) in a bowl. Stir for a minute or so and cover. Set aside; you'll be letting this sit out overnight (do not refrigerate).
Second, mix 1 3/4 cups whole wheat flour, 1/4 tsp instant yeast, and 3/4 cup of filtered water. Form a ball of dough, and, using wet hands, knead it in the bowl for about two minutes. It should feel a little "tacky" but not necessarily sticky. Let the dough rest for five minutes, then knead it for one more minute. Move it into a clean bowl and cover. Refrigerate this one overnight.
The next morning, remove this pre-dough from the refrigerater and let it sit out for about two hours.
Now you are ready to begin making the final dough.
Chop both pre-doughs into 10 or 12 smaller pieces. Sprinkle flour on them to keep them from sticking too much. Combine them in a large bowl with:
1/2 tsp salt
2 1/4 tsp instant yeast
2 1/4 tbsp honey or agave nectar
1 tbsp melted butter
Knead in the bowl with wet hands until all the ingredients are evenly integrated into the dough. If the dough is too wet, add more flour.
Dust a work area or large cutting board with flour, and knead the dough for 3 or 4 minutes, adding a little more flour if needed. The dough should feel soft and a little tacky, but not sticky. Make a ball with the dough and let it rest for about 5 minutes.
Prepare a clean, lightly oiled bowl. Knead the dough for one more minute, then form it into a ball again and place it into the oiled bowl. Cover loosely and let rise for about one hour.
Transfer the dough back to your work area and form it into the shape of your 4x8 loaf pan. Put it into the pan, cover loosely, and let sit for another hour. It should rise above the pan.
Preheat the oven to 425F, and insert a cookie sheet or small cake pan on the top rack. When the dough is ready to bake, put it into the oven, and pour one cup of hot water into the upper pan. This will act as a steam pan and give your bread a better crust.
Lower the temperature to 350F and bake for 20 minutes. Turn the loaf 180 degrees and bake for another 20 to 30 minutes, until golden.
Place bread on a cooling rack and let rest for an hour before devouring :o)
This post is linked to Real Food Wednesday and The Nourishing Gourmet. Check them out for other great real food recipes.


sounds good! I've been trying convert my read recipe to soak it but so far I haven't had much success.It always out too dense. Next time I make bread I'll try yours!
ReplyDeleteBeautiful loaf of bread!
ReplyDeleteI'm so glad you shared this, I can't wait to try to make bread like this. I use a combination of hard red and soft white. And I'm so glad to see that you use just the basic ingredients. I have friends who add so many other things to their homemade bread that it really isn't that cost effective. I've never used a lot of the additives they use, and our bread seems to be fine.
ReplyDeleteI do think my husband would like this a little better, he doesn't like heavy bread.
Thank you so much for sharing!
Yay! Just looked at your bagel recipe and have been converting all my recipes to grind and soak my grains. Glad to have one that has been tried. =0) thanks!
ReplyDeleteThis sounds great! We're gonna make this for the family this week. Thanks for sharing :)
ReplyDelete